 Block Weather station
Block Weather station
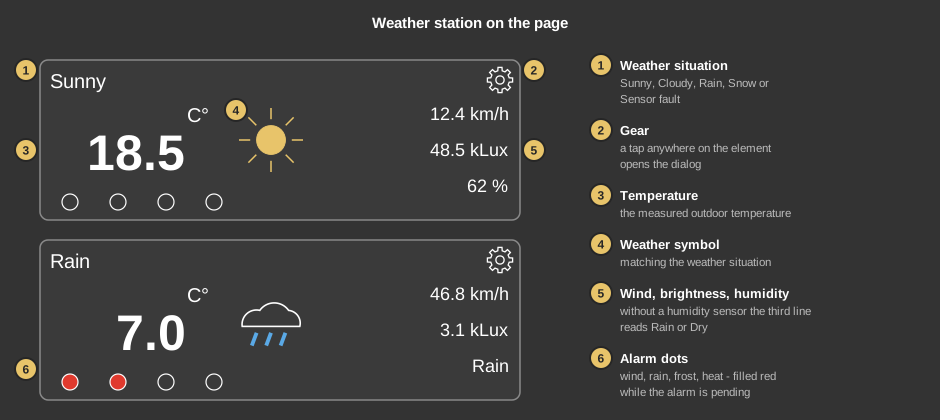
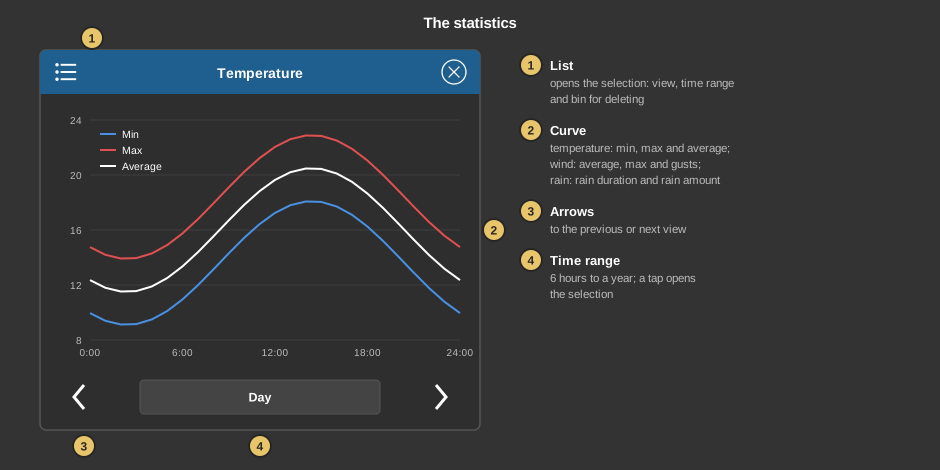
Block Weather stationThis control element shows the values of the weather station and is at the same time the place where its protective functions are set: wind, rain, frost and heat alarm, the shading per direction and the dusk. This way awnings retract in a storm, for example, without anyone having to intervene. In addition there is a logbook of the alarms and a statistic of the weather curves.
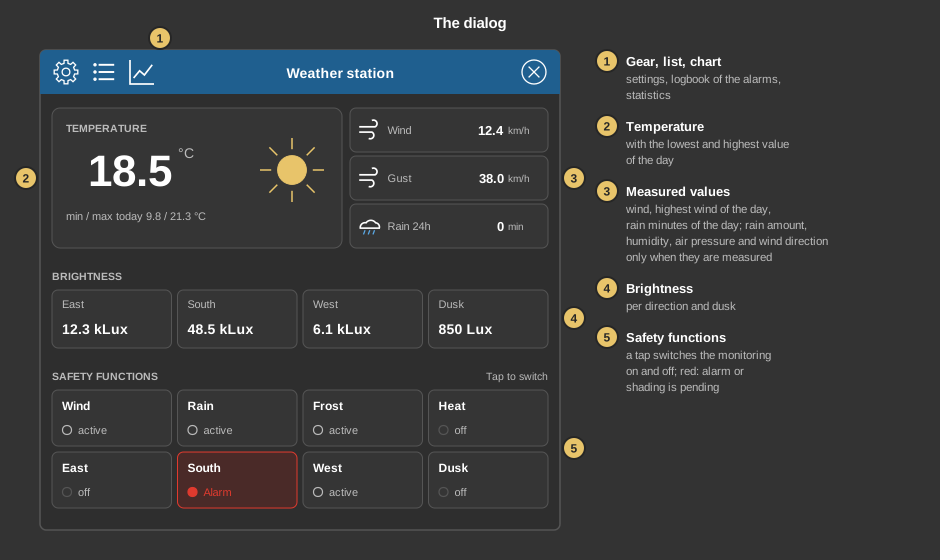
If there is a sensor fault or the test mode is running, a red message line appears at the top of the dialog. For a fault, the cause is shown to the right:
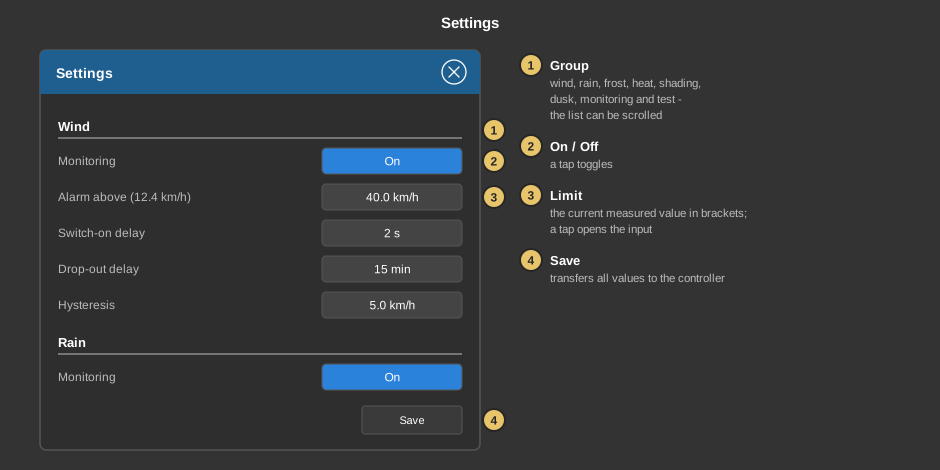
| Monitoring | Switches the respective monitoring on or off. When it is off, the corresponding alarm is withdrawn immediately. Default: wind, rain and frost on, heat, shading and dusk off. |
| Alarm above / Alarm below | Limit from which the alarm is triggered. Default: wind 40 km/h, frost below 3 °C, heat above 35 °C. |
| Switch-on delay | For this many seconds the limit must be exceeded continuously before the alarm is set. Prevents alarms caused by short peaks. |
| Drop-out delay | For this many minutes the value must stay below the limit continuously before the alarm is withdrawn. If the limit is exceeded again in between, the time starts over. |
| Hysteresis | Distance between switch-on and switch-off point: for the wind in km/h, for frost and heat as Hysteresis temperature in K, for shading and dusk as Hysteresis brightness in percent of the limit. |
| Evaluate rain amount | The rain alarm follows the rain amount in mm/h (Alarm above, default 0.5 mm/h) instead of the rain message. Only useful if the station delivers a rain amount. |
| Only with precipitation | The frost alarm only comes when rain is reported at the same time – this protects against icing without retracting needlessly in dry cold. |
| East, South, West | Shading per direction: on/off, limit in lux (default 30000), switch-on delay in seconds and drop-out delay in minutes. |
| Input is a bit | The dusk comes as a switching signal instead of a brightness value. Otherwise Dusk below in lux applies (default 10). |
| Sensor failure after | If none of the values temperature, wind and rain (or the sign of life) changes within this many minutes, the station counts as faulty. 0 switches this check off. Default 30 min. |
| Safety position | On a sensor fault the wind and rain alarms are set forcibly so that awnings retract, for example. Default on. |
| Repeat alarm every | Pending alarms are sent again at this interval (minutes) in case a telegram was lost. 0 switches the repetition off. Default 10 min. |
| Plausibility check | Values outside sensible ranges are discarded, the last valid value is kept. Default on. |
| Gust from deviation | If the wind exceeds the average by more than this value, the gust is recorded separately in the statistic. Default 15 km/h. |
| Test mode duration / Test mode | Start sets the wind and rain alarm forcibly for the set duration (1 to 60 minutes, default 2). This way you can check during commissioning whether the blinds move to the safety position correctly. The tap only starts the test and closes the window; other changes in the dialog not yet saved are not saved by it. When the time has elapsed, the alarms drop out by themselves. |
The logbook shows the latest events with date and time: wind, rain, frost and heat alarm, shading, dusk, sensor fault and test mode, each with ON (red) or OFF and the triggering measured value. This makes it possible to trace why an awning retracted. Exit closes the logbook.
This section is meant for the installer of the system.
The control element is linked with the function block Block Weather station: first create the function block together with its variables, then right-click the control element and choose the function block. The variables are taken over, the text of the element gets the name of the block. Without a link, a tap on the element points this out.
Display |
|
| Text | Title of the dialog. When linking, the name of the function block is taken over; default “Weather station”. |
| Statistic | Shows the chart symbol for the statistic in the dialog. Default on. |
| Cloudy below | Brightness in lux below which “Cloudy” is shown. The overall brightness is compared if it is linked, otherwise the highest value of east, south and west. Default 5000 lux. |
All variables are located at the function block and are taken over when linking.
See also General properties of all control elements.