 APP
APP
APP
APP With the APP you operate your building on your phone, tablet or PC: switch lights, move shading, adjust temperatures and much more – at home and on the go.
The APP is available for Android, iOS and Windows:
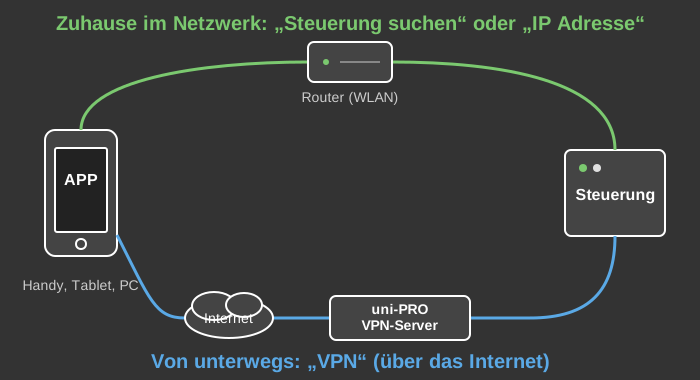
The assistant offers four options, the two connection paths at a glance:
At the first start the APP automatically shows the connection assistant. It can be opened again at any time later: tap the connection symbol (right) in the toolbar and then choose "New".
The image sequences for the following connection types automatically switch to the next step every 3 seconds – from the main menu to the connected APP.
The APP searches for the controller in the network automatically – the easiest way if the phone/tablet is in the same network (Wi-Fi) as the controller. Found controllers are shown in a list: tap the desired controller and continue with "Next". If nothing is found, the APP and the controller are probably not in the same network (e.g. separated by a router).
The network address of the controller is entered manually, for example 172.31.1.100. You can get it from your installer.
Tip: You can append a name in parentheses to the IP address, for example 172.31.1.100(Testcontroller); in the connection view only "Testcontroller" is then shown.
Connection via the internet – this way the APP also works on the go. Prerequisite: VPN is activated on the controller in the web interface and the serial number of the controller has been linked with an email address and a password. This can be done directly in the Studio or via the web interface at https://online.uni-pro.at. In the APP you then enter this email address and password.
Tip: Email and password can be copied together and pasted into one of the two fields – the APP distributes them automatically. Line break, space, tab, semicolon, comma and vertical bar are all recognised as the separator between email and password. Labels such as "User:" or "Password:" may precede the entries, as may angle brackets around the address. The "From clipboard" button takes over the credentials at the press of a button.
Connection to a demo project – to try out the APP without your own controller. After tapping, the APP connects immediately and shows the first page of the demo project:
After the selection the assistant asks for the project password. This is the password of the project on the controller (not the VPN password). It is pre-filled with the standard password and only needs to be changed if the installer has assigned an own password.
With "Test connection" the APP checks the connection; the progress is shown as text. After the message "Connection successful" press the "Save" button – the connection is saved and the project is loaded.
Possible messages during the connection test:
After the connection has been established the first page of the project is shown:
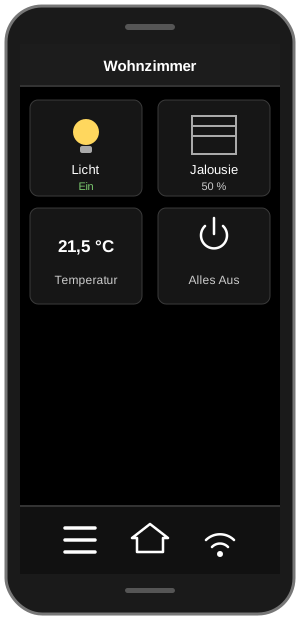
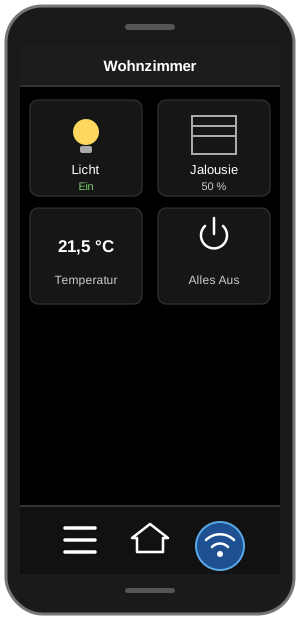
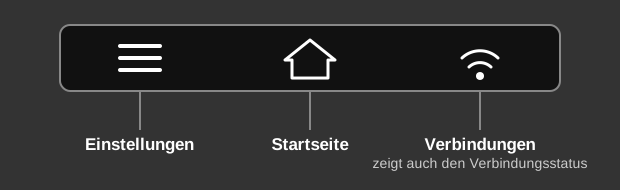
The toolbar gives access to the most important functions. It can be placed at the bottom, top, left or right edge – the position is defined in the settings:
With a toolbar at the side (left or right) less width remains for the page. On pages with vertical list scrolling all controls are therefore shown slightly smaller, because their size depends on the available width there. On wide displays such as a wall panel in landscape orientation a toolbar at the side is an advantage instead: the full height remains available for the page.
Bringing the toolbar back: If the toolbar is hidden, press and hold your finger for 15 seconds anywhere on the visualization – the toolbar is then shown again. The finger must not be moved while doing so. This also works when the APP runs in kiosk mode without a menu bar, where it is the only way back.
At the bottom of the settings menu the version of the APP and the version of the connected controller are shown.
In the Windows version these functions are additionally available via the menu bar ("Display" and "Extras").
The connection view (connection symbol on the right in the toolbar) shows all saved connections – practical if several controllers are operated (e.g. house and holiday apartment):
In the connection assistant, every installation can be given a name (e.g. "Miller house"). The name is optional; if one is set, it is shown in the list in front of the address and the installation can be addressed by it – with the start parameter --connection as well as when opening the APP via an address (see below). Existing connections without a name continue to work unchanged.
See also VPN connection.
Important: Please observe the disclaimer when using the VPN service.
The APP can be opened from the outside via an address – from a push notification, a QR code, an e-mail or another app. A specific page of the project can be given at the same time.
| unipro:// | Only opens the APP. |
| unipro://page/Livingroom | Opens the APP and shows the page "Livingroom". Upper and lower case do not matter. If the name contains spaces or special characters, they have to be encoded in the address (space = %20). |
| unipro://page/?guid=... | The same via the GUID of the page. Unambiguous, even if two pages have the same name. |
| unipro://page/Livingroom?connection=Miller%20house | First switches to the given installation and shows the page there. The part "connection" is optional – without it the currently connected installation stays. |
Instead of unipro:// the equivalent pt2020pro:// can be used.
The installation is addressed by its name, its VPN e-mail address, its IP address or by its position in the list (#2). Only installations that are already set up in the APP can be addressed – an address from the outside can therefore not add an unknown installation. When switching, the APP briefly shows which installation it is switching to.
If the address starts the APP in the first place, it takes a moment until the connection and the project are ready; the requested page then appears instead of the start page. If the page does not exist, the APP stays on the start page.
Example: In the Pushover function block, enter unipro://page/Frontdoor in the URL parameter – tapping the doorbell message then opens the page with the camera image directly.
Note for Android: Opening via an address requires APP version 2.3130 or later.
Note for Windows: The APP registers the address scheme itself on startup, no administrator is required. The entry is checked on every start and therefore points to the right file again even after the APP has been moved. If the APP is called via an address while it is already running, Windows currently starts a second APP – the call does not reach the window that is already open.
Note for Linux: Opening via an address is not available there yet.
The APP can be started with additional options. They determine which controller the APP connects to on startup, so the connection does not have to be changed by hand every time. The options are appended to the program call, usually in a shortcut.
Note: Start parameters are only available in the Windows and Linux version. They are not evaluated on mobile phones and tablets.
| Parameter | Meaning |
--connection
<identifier> |
Starts with a connection that has
already been set up. The identifier can be the name in brackets, the
IP address, the complete entry including the name, or the email
address of a VPN connection. Upper and lower case does not matter.
Instead of a name, the position in the connection list can be given:
#1 for the first, #2 for the second
connection. |
--controller
<IP address> |
Starts with a controller that does
not have to be in the connection list. With a port if required, for
example 192.168.1.50:10001. To be used together with
--password. |
--vpn-mail
<email> |
Like --controller, but
via VPN. To be used together with --vpn-password and
--password. |
--password
<password> |
Project password of the controller (not the VPN password). |
--vpn-password
<password> |
Password of the VPN access. |
--user
<user> |
User of the controller. Normally does not have to be specified. |
--logon-user
<user> |
User of the user
management the visualization is displayed with. No logon is
required on the visualization any more. Not to be confused with
--user, the user of the controller. To be used together
with --logon-password. |
--logon-password
<password> |
Password of the user given with
--logon-user. |
--instance
<name> |
Determines the name under which this APP stores its settings. Only required if two shortcuts use the same controller and should still keep separate window positions. |
--kiosk |
Starts in full screen without a menu bar. |
Please note:
--connection "Meier house".--connection=House.--logon-user is stored and also
applies to a later start without this parameter. It can be changed at
any time in the settings of the APP.--password and
--logon-password the password is readable for everyone in
the shortcut. To avoid this, set up the connection once in the APP and
then only use --connection – the access data then remains
stored in encrypted form.If two APPs are to run at the same time on one PC, connected to
different controllers, two shortcuts with a different
--connection parameter are sufficient. Changing the
connection is then no longer necessary.
172.31.1.100(House) and
172.31.2.100(Holiday flat) – this name is then used as the
identifier."C:\...\uniPRO-APP.exe" --connection House
The path already entered remains unchanged – only the part starting with
--connection is appended.
--connection "Holiday flat" there.Both APPs can now be started at the same time. Each one stores its connection, project, window size and position as well as the last opened page separately from the other. The list of configured connections remains shared: a newly created connection is also available to the other APP.
If the APP is started without parameters, it behaves unchanged and connects to the controller used last.