 Colour temperature control block
Colour temperature control block
Colour temperature control blockThis control element sets the brightness and the colour of a light – from warm, yellowish to cold, bluish light. On request the automatic mode adjusts both by itself over the day, just as daylight changes.
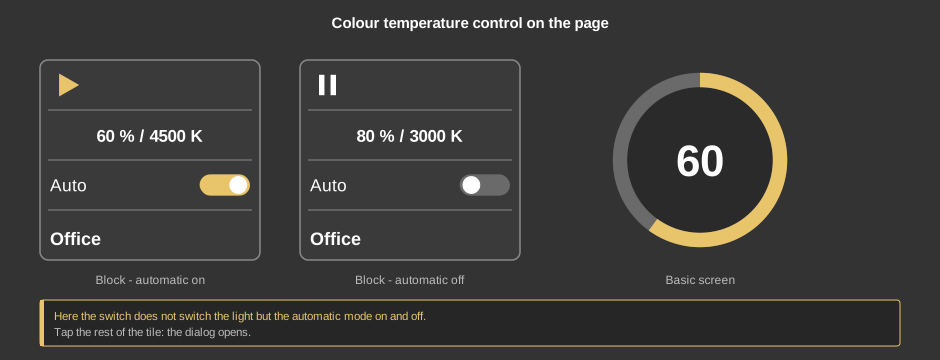
The tile shows brightness and colour temperature. The symbol at the top tells whether the automatic mode is running: Play means the day curve controls the light, Pause means it is operated by hand.
Important: The switch Auto on the tile does not switch the light but the automatic mode on and off. A tap on the rest of the tile opens the dialog. If a red W flashes, the configured operating time has been reached and maintenance is due.
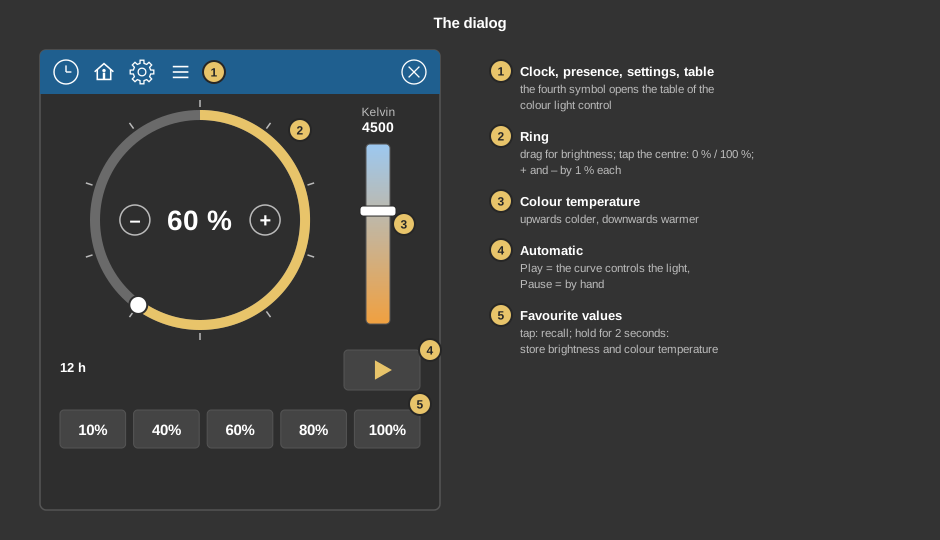
Note: While the automatic mode is running, the day curve overwrites values set by hand at the next minute at the latest. Switch the automatic mode off first if you want to set values by hand.
The colour light control imitates how daylight changes: warm, dimmed light in the early morning, bright and cool light around noon, warm and dimmed again towards the evening. Cool, bluish light has an activating effect, warm light a calming one. Anybody who spends a lot of time in rooms without daylight gets a light pattern similar to the natural one – in building technology this is also called “Human Centric Lighting”.
The colour temperature is given in kelvin: small values (about 2000 K) give warm, reddish light, large values (about 8000 K) cold, bluish light.
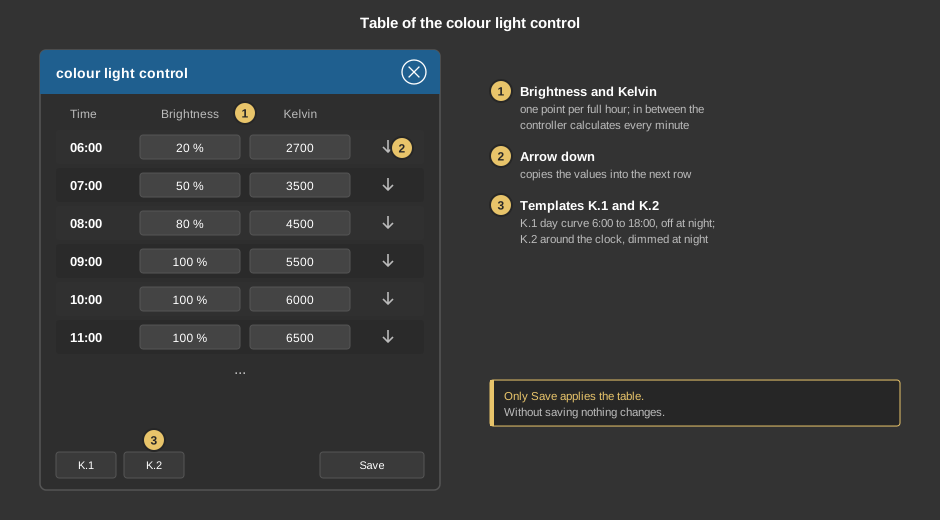
The fourth symbol of the title bar opens the table. It has one row for every full hour and is longer than the screen – it is moved by dragging.
Only Save transfers the table to the controller; it is kept there even after a restart.
With this element timer and presence switch the automatic mode – they do not set a brightness or a colour, those come from the table. For every switching time Active or Inactive is chosen as the value, for instance switching the automatic mode on at 6 in the morning. Likewise it is set for each presence state whether the automatic mode is switched on or off on the change, on request only when it is dark. Everything else about switching times and presence is described under Presence.
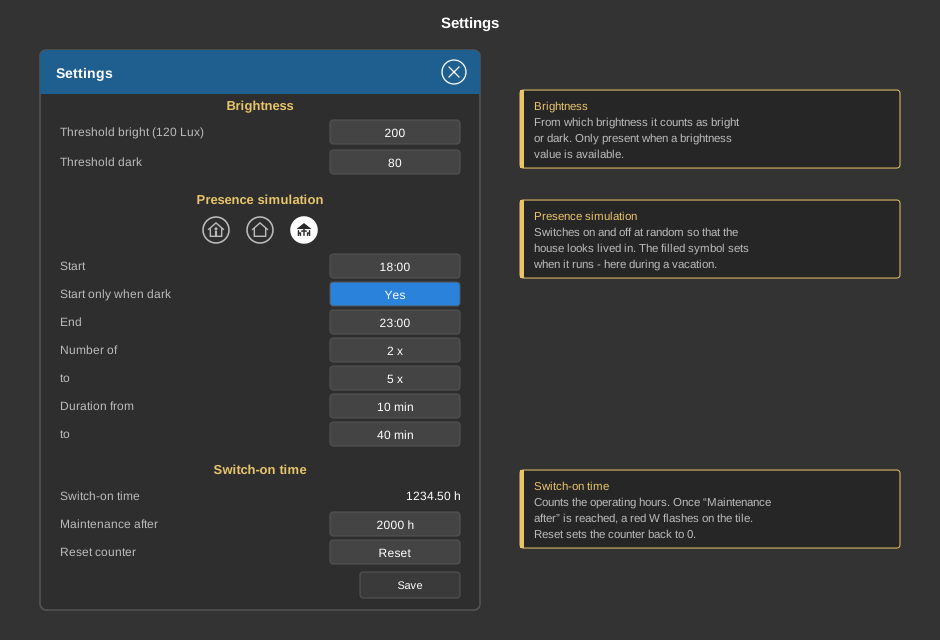
The gear opens the same settings as with the Light/dimmer block: the thresholds for brightness, the presence simulation and the switch-on time with the maintenance indicator.
This section is meant for the installer of the system.
A light is required whose brightness and colour temperature can be controlled separately – usually a “Tunable White” ballast. Its range is stated in the data sheet.
The control element is linked to the function block Block colour temperature control (right mouse button on the control element); the variables sit at the function block. The values calculated from the day curve go to its outputs Percentage and Colour temperature K – the same ones that are written when operating by hand. It only calculates while the input Automatic is not equal to 0; at 0 the colour light control leaves the outputs alone. Besides tile, dialog, timer and presence, any other place in the program can write to this input. See also Presence.
Display |
|
| Scene selection | Sets whether the element is offered for selection in the control element Block Scene Group. |
| View | Block or Basic screen. |
| Text | Caption of the tile. Its size scales with the element, a line break is inserted with \n, two lines at most. |
| Kelvin min. / Kelvin max. | Range of the colour temperature slider in the dialog, default 0 to 10000 K. Enter the range of the light here. The values of the table are not limited by it – make sure only colour temperatures the light can display are entered there. |
| Switching in basic screen | Only visible with the view basic screen. If ticked, a short tap switches the light on or off, holding it for 0.7 seconds opens the dialog. Without the tick every tap opens the dialog. |
All variables sit at the function block.
See also General properties of all control elements.