 Block
Color temperature control Block
Color temperature control
Block
Color temperature control Block
Color temperature control
With this control element a dimmer + color temperature is controlled. A color temperature control is a function that is used in many lighting and display systems to adjust the color rendering. It allows control over the color temperature, which influences the perceived "warmth" or "coolness" of the light or screen. See also Presence in general.
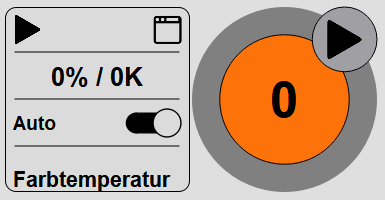
The control element is available in two different views, Block and Basic Screen. Depending on the design of the visualization, the element is shown in the following two variants:
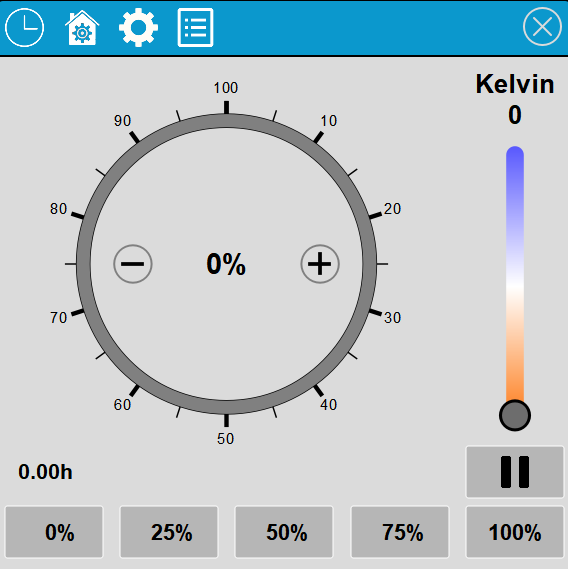

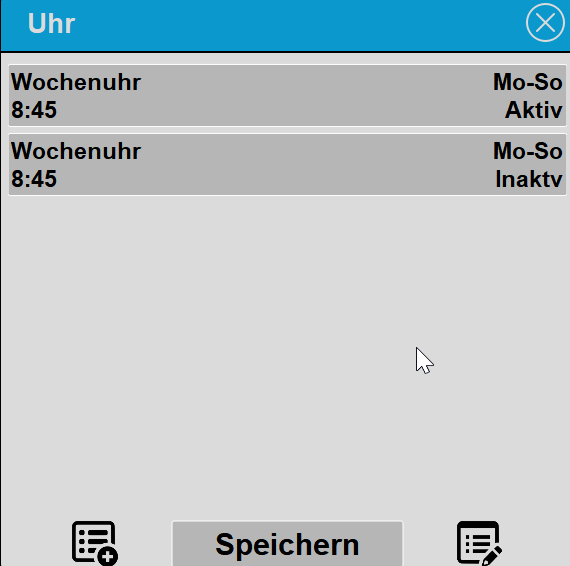
With the Time switch function the lighting can be switched time-controlled. To add a new switching time, press the symbol at the bottom left, to delete switching times, click on the symbol at the bottom right.
Using the calendar icon in the switching time list, switching times can be imported from a calendar file (iCal, *.ics) - via a link (including Google Calendar, Apple iCloud, Google Drive and Dropbox), from a file or from the clipboard. One on (value 1) and one off (value 0) switching time are created per event. For details on the import see Block Time switch; where to find the calendar links in the respective services is described in the help of the Holiday time clock.
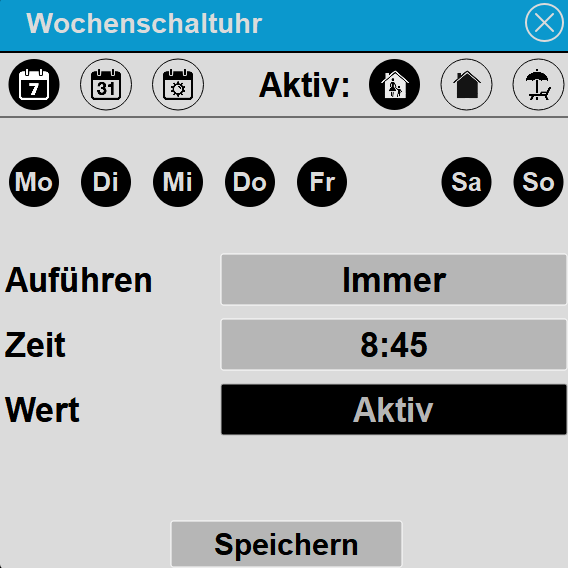
In the first row the symbols for clock type and presence are shown. On the left side the clock type is set. As type Week clock, Date and Sunrise/Sunset can be selected. On the right side it is set when the clock should be active (dark background is active).
On the right side it is set when the switching time should be active. Present, Absent and Holiday. This way it can for example be selected that a switching time is only executed when you are present, but not when Absent or on Holiday. If none of the three symbols is active, the switching time is not executed, in the overview the clock is then shown as deactivated.
Under Execute, once or always can be selected. With once, after execution the symbols Present, Absent and Holiday are deactivated again and thus the switching time is also deactivated.
If the brightness input of the function block is linked, switching times of type weekly clock offer an additional Brightness setting that determines when the switching time is executed: Always, When bright or When dark. The corresponding thresholds are defined in the settings under Brightness. Without a linked brightness input the selection is not shown and the switching time is always executed.
The configured time is the earliest possible switching moment. If the condition is already fulfilled at that time (for example it is already dark at 19:00), switching happens immediately. If it is not yet fulfilled, the switching time is queued and executed as soon as bright or dark is detected - in the example only at nightfall. The queued switching time expires after six hours; if it does not get dark by then, no switching takes place. It is also discarded as soon as another switching time of the same element is executed - the more recent switching time always takes precedence. The brightness is checked every ten seconds. If Execute: Once is set as well, the switching time is only used up after it has actually switched.
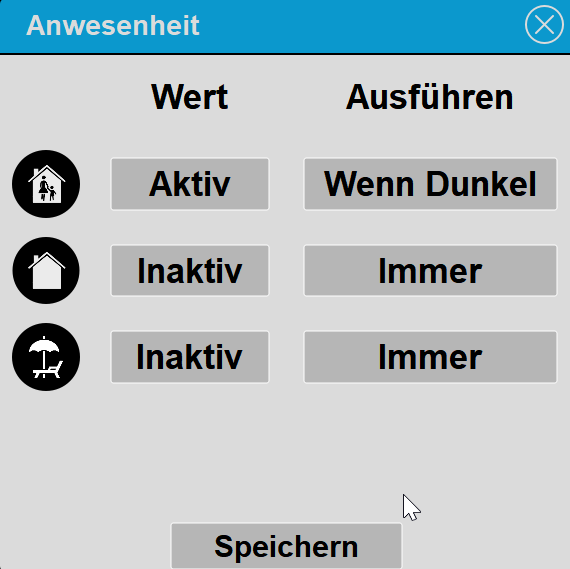
Via this dialog the control can be set when the Presence status
changes. For example when switching from Present to Absent or
Holiday, in the above example the control is
switched off. When switching from Absent to Present the control is
switched on, but only when it is dark.
For each of the three states Present, Absent and Holiday it is set via the respective symbol whether a value should be executed when switching to this state (dark background is active).
Tip: The setting Dark or Bright is only shown when the input Brightness is connected at the function block. The threshold for Dark/Bright is defined in the settings.
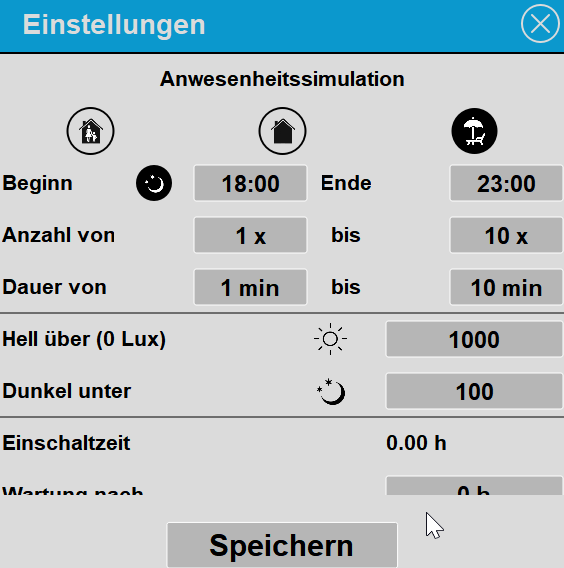
Settings are made via this dialog.
The presence simulation can be used to switch the light on/off during absence to simulate that the building is inhabited and thus deter potential burglars. The light is here switched on/off randomly.
With the symbols for Present, Absent and Holiday it is set whether the simulation should be started. In the above example the right symbol Holiday has a dark background, so the simulation is started as soon as switching to Holiday.
This setting is only available when a value is connected at the input of the function block. Here two thresholds define from when on a distinction is made between Bright and Dark. This switching threshold applies to all settings on the control element in which Bright/Dark can be selected.
In the Switch-on time section it can be set after which operating time a maintenance is due. For example when the light should be checked. Once the operating time is reached, this is indicated by a yellow symbol on the control element.
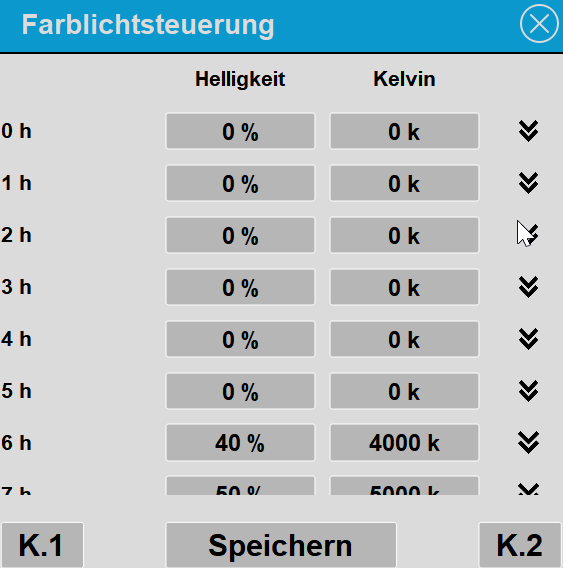
In this dialog the table for color light control is set. With the buttons K1/K2 default values can be loaded which are useful for many applications.
In the table it is set at which time which brightness and color temperature should be active. Between these steps an automatic interpolation is performed.
First create the corresponding function block and connect the variables, right-click on the control element and select the function block to link the control element.
Presence is linked with the corresponding
logic block, see function block Structured
Block Color temperature control, Standalone without link. With
Presence the variables are linked with the function block, see also
Presence in general.
First
create the corresponding function block and connect the
variables, right-click on the control element
and select the function block to link the control element.
Display |
|
| Display | Display Block, Basic Screen or List. |
| Text | Text to be shown. The size of the
text is automatically scaled with the control element.
Line breaks can be inserted with the special character "\n",
for example "Line1\nLine2", a maximum of two lines can be specified. |
| Switch in Basic Screen | With this parameter the light is
switched on a short click on the control element, on a long click
the dialog is shown. |
| Scene selection | This parameter determines whether the element should be shown in the Scene group. |
| Kelvin min/max | Limitation for the color temperature |
Connected variablesSee Block Dimmer |
|